Certificates for Cisco WLC using OpenSSL
This is a step-by-step guide with some of my own findings based on Cisco documentation, Generate CSR for Third-Party Certificates and Download Chained Certificates to the WLC, using Cisco 3504 Wireless Controllers running AireOS 8.8.120.0 and OpenSSL v1.1.1d Light.
- Why OpenSSL?
- Download and Install OpenSSL
- Modify the OpenSSL Configuration File
- Generate a Private Key and CSR
- Obtain and Prepare Certificate Chain
- Install Certificate Chain
Why OpenSSL?
Generating an identity certificate for your Cisco wireless controllers, at least for AireOS 8.8, only allows for the configuration of one Common Name (CN) and no Subject Alternative Names (SANs).
(Cisco Controller) >config certificate generate csr-webadmin US MyState MyCity MyOrg MyOrgUnit ?

<CN>           Enter Common Name

(Cisco Controller) >config certificate generate csr-webadmin US MyState MyCity MyOrg MyOrgUnit controller0.mysite.local ?

<email>        Enter the Email Address
If you desire/require one or more SANs, you can use OpenSSL to generate a private key and Certificate Signing Request (CSR), and once a public key is generated and signed by a Certificate Authority (CA), put it all together in a format that can be uploaded to the controller.
As an example, suppose you have two Cisco 3504 Wireless Controllers configured as an HA pair. You would like the management interface, which is used to access the web GUI for administration, to have an entry in DNS and a certificate that you can use to validate the identity of the controller to which you are connecting. Furthermore, each redundancy-management interface can have a DNS entry of its own and be used to access each physical appliance via SSH, or monitored by some network monitoring solution.
Download and Install OpenSSL
These are the steps I took to install OpenSSL v1.1.1d Light for 64-bit Microsoft Windows 10 using an experimental MSI from Shining Light Productions. The MSI makes it easier to package and sustain in Microsoft System Center Configuration Manager (SCCM) for future deployment. Your situation may call for a different download file and/or version.
Run the Command Prompt as an Administrator, navigate to the location of the MSI, and issue the following command:
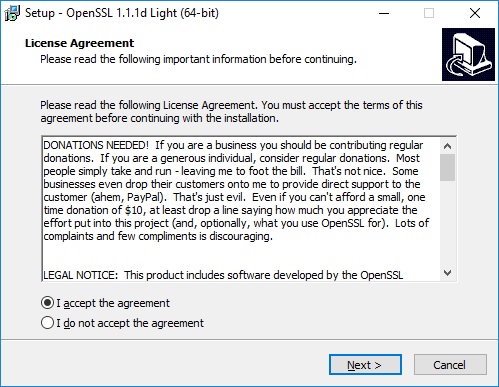
msiexec /i Win64OpenSSL_Light-1_1_1d.msiReview the license agreement. Should you choose to accept, select the “I accept the agreement” radio button, then click Next.
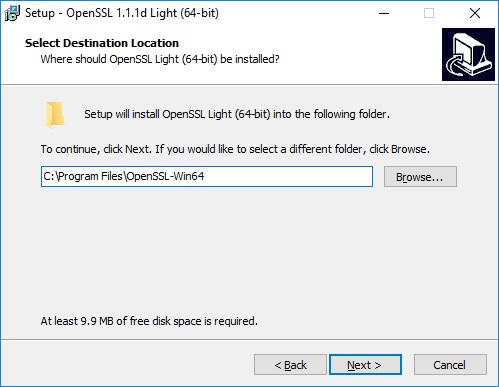
Select the location where you would like to install OpenSSL, then click Next. I opted for the default, C:\Program Files\OpenSSL-Win64
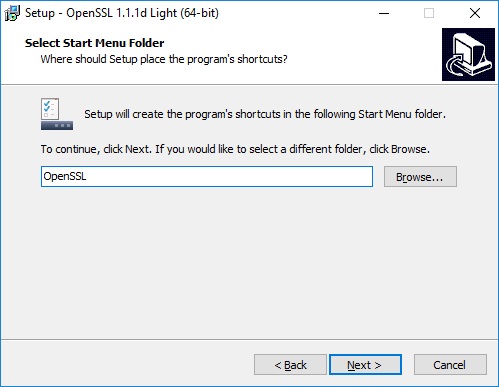
Select the location where you would like to install shortcuts within the Start Menu, then click Next. I opted for the default, OpenSSL. Interestingly, only web shortcuts seem to get installed here and not a shortcut to the application.
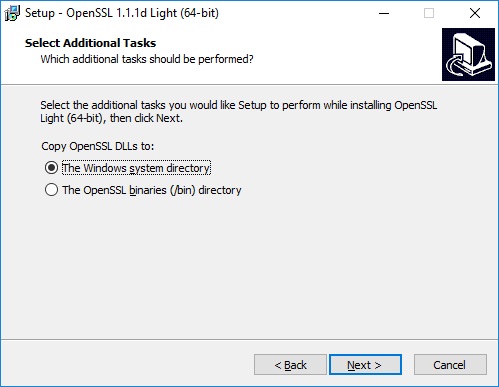
You may choose to copy OpenSSL DLLs to the Windows system directory or to the OpenSSL binaries (/bin) directory, then click Next. I opted for the default, The Windows system directory.
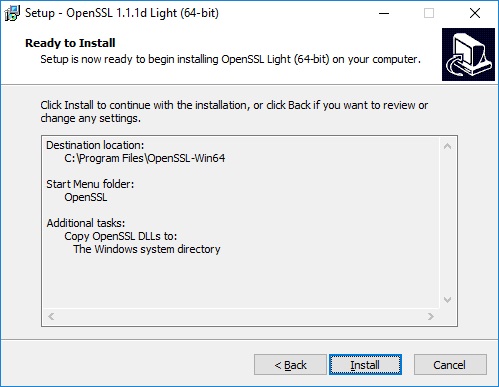
Now is your chance to review your selections and, if all looks well, proceed with the installation by clicking Install.
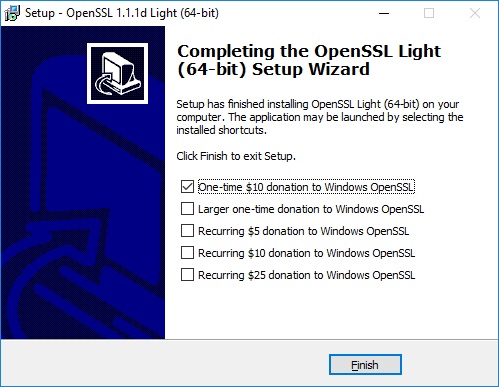
Installation is now complete. You are given the opportunity to support Windows OpenSSL with a donation if you desire.
Modify the OpenSSL Configuration File
The OpenSSL configuration file is where you will configure the SANs that you desire to include in your certificate.
Navigate to C:\Program Files\Common Files\SSL
Create a copy of the OpenSSL configuration file, openssl.cnf, to preserve default configurations. I named the copy openssl-wlc.cnf.
In the [ req ] section, the req_extensions attribute will be commented out. Un-comment this attribute.
[ req ]
default_bits		= 2048
default_keyfile 	= privkey.pem
distinguished_name	= req_distinguished_name
attributes		= req_attributes
x509_extensions	= v3_ca	# The extensions to add to the self signed cert

# Passwords for private keys if not present they will be prompted for
# input_password = secret
# output_password = secret

# This sets a mask for permitted string types. There are several options.
# default: PrintableString, T61String, BMPString.
# pkix	 : PrintableString, BMPString (PKIX recommendation before 2004)
# utf8only: only UTF8Strings (PKIX recommendation after 2004).
# nombstr : PrintableString, T61String (no BMPStrings or UTF8Strings).
# MASK:XXXX a literal mask value.
# WARNING: ancient versions of Netscape crash on BMPStrings or UTF8Strings.
string_mask = utf8only

req_extensions = v3_req # The extensions to add to a certificate request
In the [ v3_req ] section, add the following attribute and value after the keyUsage attribute: subjectAltName = @alt_names
[ v3_req ]

# Extensions to add to a certificate request

basicConstraints = CA:FALSE
keyUsage = nonRepudiation, digitalSignature, keyEncipherment
subjectAltName = @alt_names
Create a new section, [ alt_names ], after the [ v3_req ] section and include attributes DNS.1, DNS.2, etc. as needed for each required Subject Alternative Name you require.
[ alt_names ]

DNS.1 = controller1.mysite.local
DNS.2 = controller2.mysite.local
In the [ new_oids ] section, commenting out all tsa_policy attributes will allow you to verify your CSR after it is generated:
[ new_oids ]

# We can add new OIDs in here for use by 'ca', 'req' and 'ts'.
# Add a simple OID like this:
# testoid1=1.2.3.4
# Or use config file substitution like this:
# testoid2=${testoid1}.5.6

# Policies used by the TSA examples.
# tsa_policy1 = 1.2.3.4.1
# tsa_policy2 = 1.2.3.4.5.6
# tsa_policy3 = 1.2.3.4.5.7
Generate a Private Key and CSR
Run OpenSSL as an Administrator and issue the following command:
req -new -newkey rsa:2048 -nodes -keyout mykey.pem -out myreq.pem -config "c:\program files\common files\ssl\openssl-wlc.cnf"This command will generate a private key, mykey.pem, and a CSR, myreq.pem, which can be found in C:\Program Files\OpenSSL-Win64\bin
Be prepared to answer to the following:
- Country Name
- State or Province Name
- Locality Name
- Organization Name
- Organizational Unit Name
- Common Name
- Email Address
Along with some extra, optional, attributes:
- Challenge Password
- Optional Company Name
Example Output:
OpenSSL> req -new -newkey rsa:2048 -nodes -keyout mykey.pem -out myreq.pem -config "c:\program files\common files\ssl\openssl-wlc.cnf"
Generating a RSA private key
.................+++++
.......+++++
writing new private key to 'mykey.pem'
-----
You are about to be asked to enter information that will be incorporated
into your certificate request.
What you are about to enter is what is called a Distinguished Name or a DN.
There are quite a few fields but you can leave some blank
For some fields there will be a default value,
If you enter '.', the field will be left blank.
-----
Country Name (2 letter code) [AU]:US
State or Province Name (full name) [Some-State]:MyState
Locality Name (eg, city) []:MyCity
Organization Name (eg, company) [Internet Widgits Pty Ltd]:MyOrg
Organizational Unit Name (eg, section) []:MyOrgUnit
Common Name (e.g. server FQDN or YOUR name) []:controller0.mysite.local
Email Address []:myemail@myprovider.com

Please enter the following 'extra' attributes
to be sent with your certificate request
A challenge password []:
An optional company name []:
OpenSSL>
You can verify the generated CSR by issuing the following command:
req -text -noout -in myreq.pem -config "c:\program files\common files\ssl\openssl-wlc.cnf"Example Output:
OpenSSL> req -text -noout -in myreq.pem -config "c:\program files\common files\ssl\openssl-wlc.cnf"
Certificate Request:
    Data:
        Version: 1 (0x0)
        Subject: C = US, ST = MyState, L = MyCity, O = MyOrg, OU = MyOrgUnit, CN = controller0.mysite.local, emailAddress = myemail@myprovider.com
        Subject Public Key Info:
            Public Key Algorithm: rsaEncryption
                RSA Public-Key: (2048 bit)
                Modulus:
                    00:e0:d6:a7:47:bd:5f:0d:f5:38:b7:d1:fd:06:75:
                    48:2f:9a:d2:79:42:92:76:6c:b3:55:01:78:16:83:
                    be:2a:90:83:0a:91:9d:4a:82:4b:21:69:fb:cc:cf:
                    bb:29:1b:6b:c3:68:d7:0b:e3:7f:6f:59:8b:f4:7a:
                    dc:35:cb:7a:7c:c0:29:51:a7:55:cb:61:5e:cd:31:
                    70:66:93:b2:26:28:14:ae:1f:5c:97:70:eb:d2:60:
                    76:0d:e0:2c:f1:68:33:09:38:20:ab:4d:9c:e2:fd:
                    26:f4:45:c8:21:44:d4:bf:56:1d:ee:85:14:5a:75:
                    b6:54:c9:1d:03:6a:c6:e8:75:08:2e:64:bb:07:ef:
                    e2:b3:11:1d:3d:5d:95:92:1b:7d:15:34:51:76:76:
                    32:8e:28:b3:35:a9:77:56:8c:9c:31:75:e4:ff:7f:
                    7c:82:10:cf:24:fa:63:93:0f:15:25:98:ba:a9:3c:
                    28:31:1a:09:b3:c4:e7:a5:fc:6d:9a:c4:32:66:86:
                    33:d9:02:54:67:6c:dd:c6:75:42:88:f6:e8:68:97:
                    2e:99:12:a6:91:06:bb:53:1e:95:5d:fd:44:69:a4:
                    ba:a7:7b:01:9f:0b:0b:63:dd:f1:1d:5f:0e:18:29:
                    69:e7:cf:0b:4c:33:61:ca:e0:f0:70:b3:a3:54:7c:
                    f6:d7
                Exponent: 65537 (0x10001)
        Attributes:
        Requested Extensions:
            X509v3 Basic Constraints:
                CA:FALSE
            X509v3 Key Usage:
                Digital Signature, Non Repudiation, Key Encipherment
            X509v3 Subject Alternative Name:
                DNS:controller1.mysite.local, DNS:controller2.mysite.local
    Signature Algorithm: sha256WithRSAEncryption
         22:71:5a:2f:d0:6f:39:e4:56:b7:51:b1:8c:84:5c:b0:b3:a4:
         57:5e:c7:15:1a:b6:5a:44:2f:50:df:74:d2:15:04:e9:2e:c7:
         37:86:a9:5c:85:f8:fb:99:23:e7:27:ac:17:46:7a:a7:a1:e0:
         37:e9:90:14:cf:97:fe:e6:f9:08:ae:6a:59:26:a3:78:73:18:
         cb:51:a8:d8:61:cf:5b:7c:45:3b:10:c8:c3:8e:14:d6:1c:54:
         0a:ba:57:27:44:ac:29:a3:e3:7e:60:bd:ff:93:98:56:3c:17:
         7c:dd:d9:b4:a6:3c:98:aa:26:92:8b:99:57:1f:e0:41:bb:c1:
         13:5e:4d:4f:0b:cc:ff:04:33:41:48:26:6f:a2:63:c4:cb:ce:
         84:10:e0:38:4e:c6:1f:d4:de:cc:1a:c4:8b:9e:d7:ca:00:3a:
         32:bd:fe:38:be:8b:99:bb:22:b7:56:27:25:a1:a7:11:c0:61:
         4b:9d:04:50:c6:5d:cc:b2:a0:11:9a:69:e1:ff:de:bc:6a:af:
         5e:9b:dc:af:c2:fc:ba:04:21:04:51:cb:05:3c:02:13:b4:3b:
         b1:3d:08:92:66:34:ae:be:ac:a1:86:3f:68:ff:bf:13:ce:0d:
         65:1a:9a:ac:85:7e:e8:7c:09:78:c2:ac:89:2a:6f:9c:15:d1:
         fd:7e:97:28
OpenSSL>
The Cisco documentation does not address the tsa_policy lines in the configuration file. If you do not comment these lines out, the output for your verification might look like this:
OpenSSL> req -text -noout -in myreq.pem -config "c:\program files\common files\ssl\openssl-wlc.cnf"
problem creating object tsa_policy1=1.2.3.4.1
9452:error:08064066:object identifier routines:OBJ_create:oid exists:crypto\objects\obj_dat.c:698:
error in req
OpenSSL>
OpenSSLv1.1.0e CSR verification error, problem creating object tsa_policy1=1.2.3.4.1 #2795
Obtain and Prepare Certificate Chain
The CSR is submitted to a CA for signing and you should receive in return your requested signed identity certificate for your controller along with an intermediate and root certificate for the CA. These can be delivered to you in a variety of ways such as separate files (e.g. PEM) for download or via email, or to copy and paste from a website.
In any case, you will take the contents of each of these and concatenate them into a single file, for example, All-certs.pem, using your favorite text editor.
-----BEGIN CERTIFICATE-----
[Identity Certificate]
-----END CERTIFICATE-----
-----BEGIN CERTIFICATE-----
[Intermediate Certificate]
-----END CERTIFICATE-----
-----BEGIN CERTIFICATE-----
[Root Certificate]
-----END CERTIFICATE-----
We can now return to OpenSSL to integrate the private key generated earlier into PKCS#12 format by issuing the following command:
pkcs12 -export -in All-certs.pem -inkey mykey.pem -out All-certs.p12 -clcertsExample Output:
OpenSSL> pkcs12 -export -in All-certs.pem -inkey mykey.pem -out All-certs.p12 -clcerts
Enter Export Password:
Verifying - Enter Export Password:
OpenSSL>
…and finally generate final.pem for installing onto the controller by issuing the following command:
pkcs12 -nodes -in All-certs.p12 -out final.pemExample Output:
OpenSSL> pkcs12 -nodes -in All-certs.p12 -out final.pem
Enter Import Password:
OpenSSL>
If you issue the command from the Cisco documentation which does not include the -nodes flag, you will be asked for a PEM pass phrase (which we did not set) and the output for your verification might look like this:
OpenSSL> pkcs12 -in All-certs.p12 -out final.pem
Enter Import Password:
Enter PEM pass phrase:
Error outputting keys and certificates
9452:error:28078065:UI routines:UI_set_result_ex:result too small:crypto\ui\ui_lib.c:905:You must type in 4 to 511 characters
9452:error:2807106B:UI routines:UI_process:processing error:crypto\ui\ui_lib.c:545:while reading strings
9452:error:0906406D:PEM routines:PEM_def_callback:problems getting password:crypto\pem\pem_lib.c:59:
9452:error:0907E06F:PEM routines:do_pk8pkey:read key:crypto\pem\pem_pk8.c:83:
error in pkcs12
OpenSSL>
Enter PEM pass phrase when converting PKCS#12 certificate into PEM
Install Certificate Chain
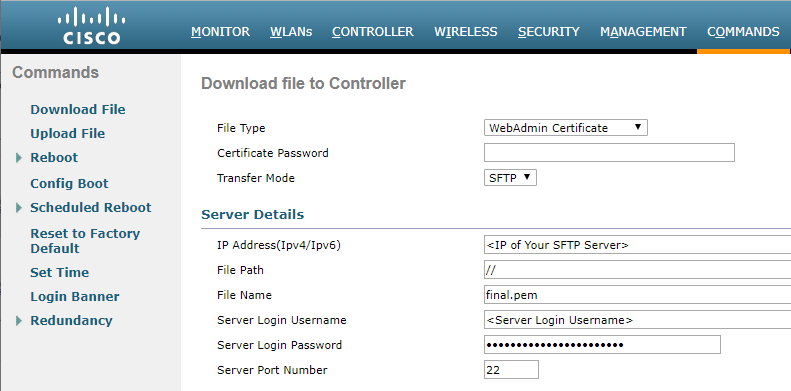
You can now download final.pem to the controller as a WebAdmin or WebAuth certificate via the GUI or CLI using your favorite Transfer Mode.
Great document. Bookmarked !!